District Officers, share the hard work of your presenters by uploading the presentations from your district meeting to the District Presentations Archives. Please follow the steps below.
​Note: the District Presentation Archives are for technical content. Please do not upload minutes, scholarships, presentations related to district business, or event photos. We encourage you to upload these to your
District Community.
Only current District Officers can upload to the District Presentations Archives.
Pre-Upload Step: Convert All PowerPoints to PDF
Not everyone has access to Microsoft Office, so saving all PowerPoint files as PDF will make sure they are more universally accessible.
To convert the .ppt or .pptx files into PDFs, open each file in
PowerPoint. Then, select "Save As" and chose "PDF" as the file type.
Different versions of PowerPoint may look different from the version
depicted.
You may also upload audio files to the archives (mp3, mp4, etc.).
Step 1: Log in to District Presentations Archives
If you are not already logged into the website, you will be prompted to log in.
Step 2: Settings: Site Contents
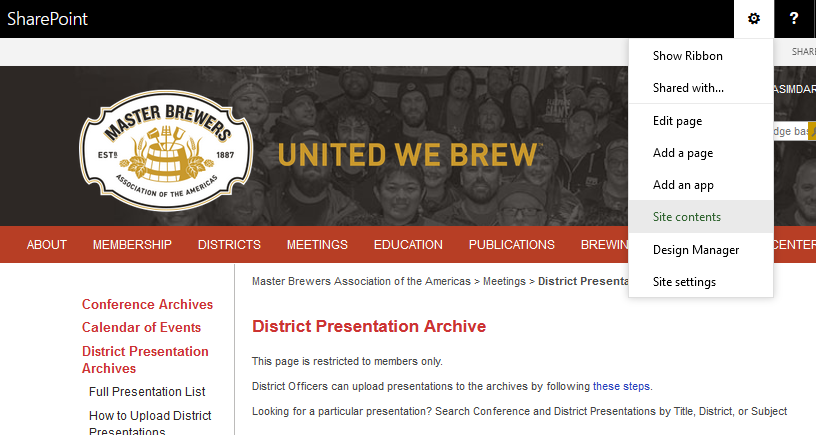
In the upper right corner of the browser page, you should see a gear icon. Click on the icon to open the dropdown menu, then click on
"Site Contents."
If you are an active District Officer but you do not see the gear icon in the upper right corner of the webpage, please
contact us.
Step 3: Access District Presentations Library
You will be taken to a screen that shows the structure of the
website. Click on "DistrictPresentations" to enter the "District
Presentations" Document Library.
Step 4: Select "Upload"
At the top of the document library, click on "Upload."
Step 5: Upload
The page will gray out and a small window will appear in the browser. Click "Browse" to select your PDF from your computer, then "OK" to upload.
Depending on the file size, it may take a few minutes for the file to upload.
Step 6: Fill Out the Document Information
Fill out the following fields:
- Content Type: Select MBAA District Presentations
- Name (required) - The name of the document on the back end. No need to change.
- Title - This will be the name the item is listed under on the website. We recommend using the presentation title and author last name. e.g., Confined Spaces (Jaeggi/Godfrey)
- Event Start Date - Select the start date of the event (MM/DD/YYYY)
- Event Title (required)- List the title of the event where the presentation was given. We recommend you be careful to name the event the same thing across all uploaded documetns.
- District Name (required) - Use the dropdown to select the District that hosted the event.
- ​Specific Category (required) - Select the keyword that
most applies to the content of the presentation. This selection will �tag� the
presentation for better search functionality on the Master Brewers website. For
a full list of keyword options, see Tech
Now Tagging Keywords_FINAL.xlsx
​- Media Types -Select the media type tag that best applies. Most likely, you will select "District PowerPoint"
- ​​​Difficulty Level - Select the difficulty level that most applies to the content of the presentation. For the definition of each difficulty level, see the Tech Now Tagging document linked above.
- ​Additional Search Terms - This selection allows for a
more detailed search functionality. Important!: Select the same term you
chose for �Specific Category�, and then add up to three
additional keywords that apply to the presentation. For additional key word
options, you can again access the tag icon to the right of the field. This will
pull up the �Specific Category� items-use the arrows to the left to drill down
into further options that may be applicable.
- Page Summary- In one or two sentences, describe the content of the presentation.
If you are uploading multiple presentations from the same event, make sure the Event Title and Event Start Date are the same across all uploads to ensure they are listed in t​he same group on the
district-sorted archive.
Once all information is entered, click SAVE
You're Done!
Your file will be automatically populated in all lists in the District Presentations Archives. You can check by District
here and by Category
here.
Recommended Step: Notify Your District
Your presentation will be announced in the weekly Mash update, but we recommend also posting a notification on your
District Community.